Wednesday, March 11, 2015

Big Cats, Little Cakes

Okay, so it's been a reeeeeeallllly long time since I last posted. The truth is, I have a whole bunch of posts started, but alas, never got around to finishing and posting them. So I think I am just going to start fresh with this one.
Lately, most of the crafting I've been doing has been of the kitchen variety. I've kind of been on a new-recipe-trying kick. I've been feeling the winter blues and wanted to shake things up a little, henceforth all this experimentation. Some have turned out better than others...and some were, er, not quite up to par. These cupcakes did not turn out quite perfect, but I thought they were so cute, I want to share them anyway.


I needed to make cupcakes for a Big Cats themed party. So I tried to cram in as many as I could get into one cupcake. I made lion-topped cupcakes in leopard-printed liners...with tiger stripes on the inside!
The recipe I used came from here. The author took the recipe from another site, where it was posted as a single large cake, and she turned the into cupcakes. I further adapted it for my own purposes.
Are you familiar with zebra cakes? These are cakes that get a striped effect on the inside via a special batter pouring technique. You divide your plain or vanilla flavored cake batter in two, and usually leave one half as is and make the other half a different color and often a different flavor. Commonly, this is done by adding cocoa powder. Then you use a piping bag or soup ladle to pour concentric circles of the different colors on top of each other, which creates the striped effect. Zebra cake batters can't be too thick, or it won't work. I have also seen them done with cheesecake batter. Zebra cheesecake, with white and dark chocolate stripes, happens to be my husband's favorite dessert. Some even go so far as to use three or more colors, using food coloring to create a rainbow of stripes in whatever colors you can imagine. But that is a fairly different effect than the alternating striped look.
For my cupcakes, I wanted orange and black tiger stripes, so I colored half of my mixture with red and yellow food coloring to create orange, and added dark cocoa powder to the other half. Then I felt it was still too brown, so I added black food coloring to deepen the color. It was pretty much jet black after that, just as I wanted.
I had a slight mishap as I was mixing the colors. The batter was already a pale yellow color from the eggs, so I just added a little bit of yellow food coloring to deepen the yellow. But when I went to add a few drops of red to make it orange, disaster struck. First, I realized that the tube of red food coloring I was squeezing into the batter was actually writing icing!

WHY do they come in identical tubes where the outside of the tube says only what color it is, not what product is actually inside?!? I had bought four-color packs of both icing and food coloring gel, and the tubes all looked identical. The boxes they came in did obviously state what was inside, but the boxes had long been ruined and I was keeping the tubes of icing and food coloring in separate plastic bags. Somehow, the red icing tube must have mistakenly been put in the bag of food coloring.
I now had no red food coloring gel, and going out to the store wasn't an option. I did, however, have a bottle of red liquid food coloring, so my only choice was to use that. Unfortunately, I decided to pour a drop or two straight from the bottle instead of pouring it on a spoon first, and my control of liquids from tiny bottles is clearly not as good as I imagined it was, because several large drops slipped out and dyed my batter red. Uh-oh. Only one thing left to do. I attempted to fix the mistake by adding more yellow to make up for the excess red. I squeezed in whatever was left in the yellow gel tube. No change. I then turned to my bottle of yellow liquid food coloring. A few drops, then a few more...and then the entire bottle, which was brand new. Still no change. That red is just so much stronger than the yellow! I found a second bottle of yellow food coloring in the cupboard. I poured and poured until I had emptied the second bottle. It finally started to make an impact. My batter was now dark reddish orange and I had no more food coloring, so it would have to do.
But now I had another issue. The recipe lists a range of how much cocoa you can add to the brown batter. I used the maximum amount, 5 tablespoons. That amount thickened the mixture quite a bit, and the thick paste food coloring I added to make it blacker did not thin it out any. It could not even be piped easily. But the orange mixture had two full bottles of liquid food coloring in it, which made it much more liquid. If the two mixtures are very different in weight or texture, the stripes won't turn out right. I needed to thin the black mixture with a decent amount of water, I'm not sure how much. It still wasn't quite as thin as the orange mixture, but I was afraid to mess with it any more.
Most zebra cake recipes tell you to either squeeze the batter out of a piping bag to form the cake, or use a soup ladle. This helps you control how the batter comes out so you can get nice stripes. I opted to use my trusty squeeze bottles. I have several soft plastic squeeze bottles made by Wilton. They come in handy for many things.
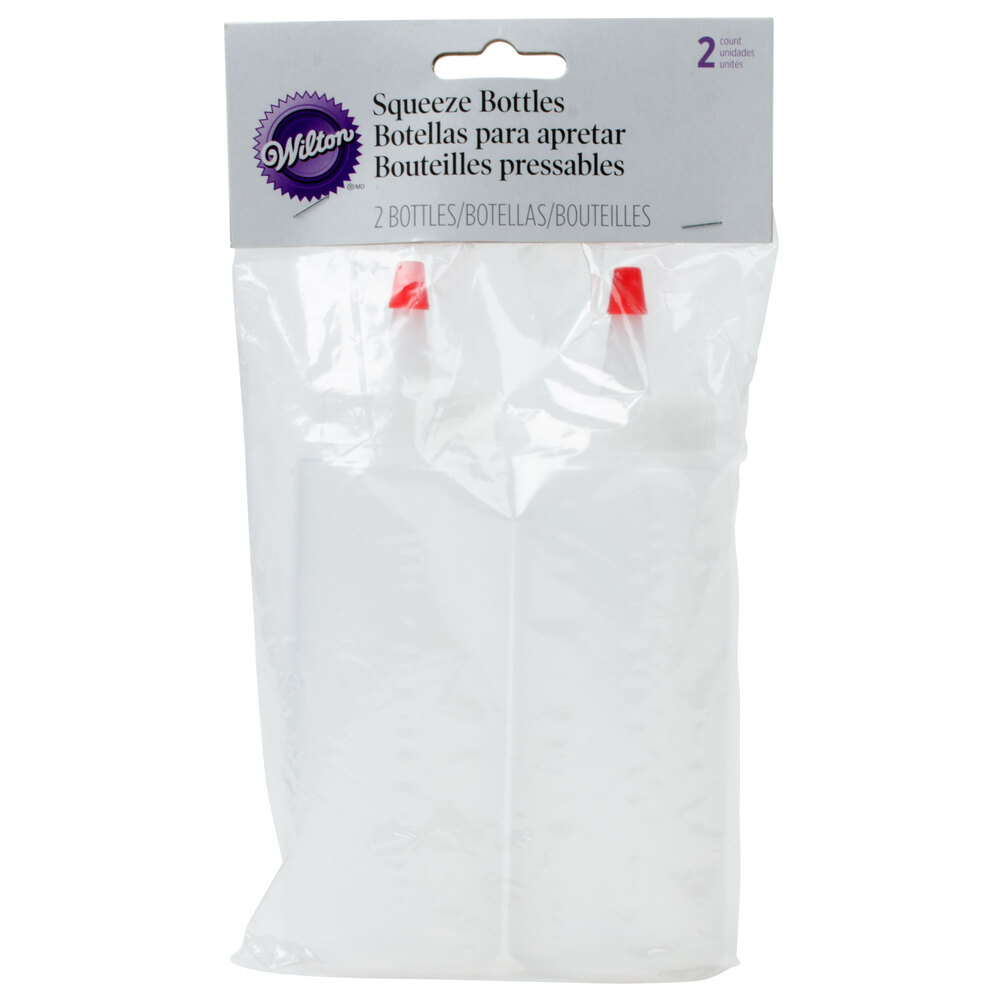
They don't hold much, so I ended up having to refill them after every four cupcakes or so, which was kind of a pain, but they did make forming the cupcakes a lot neater and easier. I used a funnel to spoon the batters neatly into the bottles.
When you make a zebra cake, you first pipe or ladle a small circle of one batter into the bottom of your baking pan. Then you pipe a roughly equal amount of the other color onto the center of the first circle. The lower circle then spreads out around the upper one. Then you pipe more of the first color onto the center of the upper one, and keep alternating colors until your pan is full. It's important to hold the piping tip close to the batter in the pan so it comes out neat, but not so close it dips into the batter in the pan.
For cupcakes, you do the same thing on a smaller scale, umpteen times. You need patience.
From previous experience, I learned that printed cupcake liners often darken their colors and turn dingy looking in the oven. The solution is to bake them in doubled liners. Unfortunately, I didn't have enough of the leopard-print liner to double all of the cupcakes, so I decided to use plain white liners for the insides and stick them inside the leopard liners. This did not turn out too well, as the liners did not fit together perfectly and leopard ones spread out while the white shrank inwards, so they came out separated instead of nestled inside each other

 My reddish orange cupcake mixture turned darker in the oven. When it came out, it was a lot more red than orange. Also, in most of them. the layers kind of rearranged themselves in the oven, and most of the cupcakes came out with a red bottom, thick center layer of black, and red on top. All the layers I painstakingly piped out seemed to have merged into one. Only a few were lucky enough to keep more than one of their black stripes. But from the top, before opening them, they stayed as before, with pretty rings of alternating colors. When I cut them open, there was also another surprise - the bottoms were all hollow. There was a kind of little cave inside!


Very strange. I have never had that happen. I googled around a lot, but couldn't find anything that would shed any light on why this happened. The only thing I can think of is, too much mixing what with adding all that food coloring.
I ended up making another batch of cupcakes, actual orange striped ones this time. I actually had enough black batter left over from before, so I only made half the recipe to get orange. This time, I was super careful and the color turned out perfect. But they still all came out with that weird little crater on the bottom.


No matter. I wasn't going to redo these guys. I got to work making these cute little fondant lions. I found the original inspiration photo on Etsy, here.
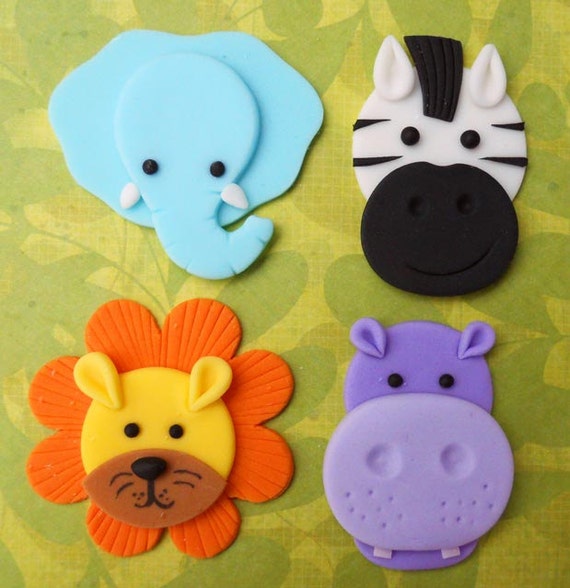

 I used more "natural" coloring, and didn't bother with the texture on the lion's mane. I often make and color my own marshmallow fondant, but these cupcakes had eaten up quite enough of my time so I went with store-bought this time. I used a flower cookie cutter for the mane shape, and an upside-down shot glass to cut out the face. I'm too cheap to buy a round cookie cutter, ha ha! For the muzzles, I cut out more circles and cut off the bottoms with the same shot glass. The ears were cut out with the "wrong" end of a medium-sized piping tip, cut in half, and pinched at the bottoms. I melted chocolate in a small ziploc bag and cut the tiniest of holes in one corner to pipe little dots for the eyes. For the noses, I piped a little horizontal line shape and used a toothpick to draw the center of it down a little bit to form the point of the triangle. The rest of the features are done with an edible marker.

Now I needed a way to stick the lions to the tops of the cupcakes. I didn't feel like messing around with buttercream. I wanted to add some yummy chocolate flavor, but dipping them in plain old melted chocolate wasn't going to do it for me. I wanted my chocolate SHINY, and not crack-able, so it would have to be a glaze of some type. But most glazes I'm familiar with stay kind of soft and moist, which means the fondant lions would not be very stable, especially since they would have to be transported. So to sum up, I needed a glaze that would dry and harden yet stay shiny and taste like chocolate. And firmly stick those fierce li'l guys to my cupcake tops. So I tried out this one from burntapple.com because it sounded like it might fit the bill and didn't require any milk. I used the coconut oil option. It was pretty good, if not perfect. It did get dry on top, and somewhat firm, but not what I would call hard. After sitting out in the open overnight, if you put a finger on top of the dry glaze and pressed down lightly, your finger would crack the surface and leave an indent.


See the fingerprint?You would not be able to use this to ice cookies and then stack them, for example, but they did hold the fondant on the cupcakes, as long as I kept them in a cardboard box, When I sealed a few cupcakes in a plastic bag overnight, the glaze turned totally mushy. But it was a little bit shiny, tasted good, and was easy to use to dip and get a nice even coating on the cupcakes.


I'm reposting the original recipe below if you want to try it. I made the following changes: I added food coloring, and quite a lot of it, at that. And, I needed them to be dairy-free, so I used water in place of the milk. I do that all the time in baking, and I have never had a problem thus far, but these obviously did not come out quite right, so maybe that was a possible cause.Who knows. The only other thing I think it could have been was overmixing, what with all the food coloring I added. Or the batter texture issues caused by all that food coloring. Maybe I will try again and see. Or maybe not. One other change was using vanilla extract in place of vanilla powder, which I can't get in my area. I could not get a consensus on how much to add, so I just used a teaspoon, which is a typical amount found in cakes. The taste seemed fine to me.

Zebra Cake
(recipe from Farida)

Ingredients:
4 large eggs, at room temperature
1 c. granulated sugar
1 c. milk, at room temperature
1 c. oil
1/3 tsp. vanilla powder (optional)
2 c. all-purpose flour
1 Tbsp. baking powder
4-5 Tbsp. dark cocoa powder

In a large mixing bowl, combine eggs and sugar. Using a hand-held electric mixer or wire whisk beat until the mixture is creamy and light in color.

Add milk and oil, and continue beating until well blended.

Add vanilla powder and baking powder to the mixture. Gradually add flour and then beat until the batter is smooth and the dry ingredients are thoroughly incorporated.

Divide the mixture into 2 equal portions. Keep one portion plain. Add cocoa powder into another and mix well. The color of the cocoa batter should be quite dark, so add more if needed.
Preheat the oven to 350 F.

Lightly grease the pan with oil. If you don't have non-stick baking pan, grease whatever pan you have then line it with parchment paper.

The most important part is assembling the cake batter in a baking pan. This is what you do. Scoop 3 heaped tablespoons of plain batter (you can also use a ladle that would hold 3 tablespoons) into the middle of the baking pan. Then scoop 3 tablespoons of cocoa batter and pour it in the center on top of the plain batter. NOTE: Do not spread the batter or tilt the pan to distribute the mixture. It will spread by itself and fill the pan gradually. Continue alternating the batters until you finish them. The pictures below will guide you through.

Bake in the oven for about 40 minutes. Do not open the oven door at least the first 20 minutes or the cake will shrink and will not rise. To check if the cake is ready, insert a toothpick into the center. It should come out clean when ready. Remove from the oven. Immediately run a small thin knife around the inside of the pan to loosen the cake, then invert the cake onto a cooking rack. Turn the cake back over and let cool.

Chocolate Glaze

  • 2 Tbsp. melted butter or 2 tablespoons oil (melted coconut oil works fine too)
  • 2 Tbsp. unsweetened cocoa
  • 2 Tbsp. hot water
  • 1 c. confectioners' sugar
  • 1/2 tsp. vanilla extract

  • Mix together ingredients in a bowl. Stir until smooth. Add additional hot water (1-2 teaspoons at a time) to thin if needed. As sauce cools it will begin to thicken. To keep at the same consistency you may need to add in an additional 1-2 teaspoons of water at a time to thin and keep in it's original form. Dip cookies, donuts, or pour over cake or cupcakes for a glaze.
  • Glaze makes enough to dip the tops of approximately 12 cookies depending on size, 12-18 donut holes, the tops of 6-12 regular donuts, the tops of 12-18 mini donuts, one 9" round cake or the tops of 8-12 cupcakes.


Wednesday, August 13, 2014

Toddler Pillowcase

My two-year-old has a yucky stomach bug. Which led to him waking up covered in vomit several times during the night. Which led to using towels in his bed because I was all out of clean bedding. Which led to the thought that I really do not have enough spare pillowcases for him. Which led to me sitting down and whipping up a new one. (Which, okay, led to me writing this post, but you already knew that just by looking at the title).

My toddler does not use a regular adult-sized pillow. We inherited a cute little pillow complete with pillowcase from an older cousin who grew out of it. I don't know where they got it from or what the size measurements are, but I do know that it's the perfect size and thickness for my toddler's little head, and likewise for his little bed. Groan-worthy rhymes aside, I love that it isn't so soft as to give me suffocation phobia, but not so firm as to be uncomfortable. I do know that my toddler loves it, won't sleep without it, and I have never seen any pillowcases in stores that would fit this little pillow. But clearly, we needed another one. So while I was waiting for the rest of his soiled bedding and pjs to emerge from the wash, I whipped this up from an old shirt. It didn't come out perfect, but it does the job, the kid's happy, and I learned something for next time. Because surely there will be a next time. Because it just so happens that I was given some nice fabric that would be perfect for making him a new sheet and matching pillowcase set. And his old sheets are really washed out and getting holey, being hand-me-downs and all.

For now, though, my husband had an old white mesh polo shirt that was full of stains and holes, so I decided to upcycle it into my new pillowcase. Obviously, it would have been way cuter if I had used a striped or patterned shirt, but I had what I had and that was that. Of course, I cut carefully so as to avoid the stained/holey portions. Originally, I was concerned that the bumpy mesh texture wouldn't be all that comfortable to sleep on. I had visions of my kid waking up with the texture of the fabric imprinted on the face. I decided, therefore, to use the opposite side of the fabric for the outside, and keep the bumpy mesh on the inside. Unfortunately yet typically, when I was pinning my pieces together for sewing, I got mixed up (cuz I'm awesome like that) and ended up sewing it together with the mesh on the outside. But I realized (rationalized?) that the fabric is already so soft and worn from countless washings and wearings, that you really can't feel the bumps much at all. I pressed my face to it and it did feel totally comfortable, so I decided to just leave it as is. The kid was perfectly happy with it, so that's a win as far as I am concerned.

Now, there are instructions out there for how to do a project like this.

http://www.marthastewart.com/270503/three-ways-to-make-a-pillow-cover

http://thehappyhousie.com/super-crazy-easy-fast-ten-minute-one-piece-envelope-pillows/

But I only discovered those after I had already done mine. Before I started, I didn't even bother looking, so sure was I that I could do it just fine all on my own, without any instructions. I should've checked first, maybe I would have done a better job. But that's water under the bridge now. I just made things up as I went along.

So here's the method I used. First, I opened the side seams of the shirt in order to be able to lay it flat with the front and back hems lined up. I wanted my pillow cover to be an envelope-style, because I hate when the pillow tries to escape from the case during the night. I prefer the style that has the opening at the center back, so the sides look nice and clean and closed, unlike some pillows which have the envelope opening at the side end. In order to do this, you need to have the back piece cut into two halves with some overlap between them. I wasn't sure how much the two pieces are supposed to overlap, so I just guessed five inches, a somewhat random number I pulled out of my imagination. It was actually way too much and it's pretty difficult to get the pillow in and out of the case. After the fact, research revealed that the normal amount would be four inches for an adult-sized pillow. For this one, two or three inches would have been great. So, I figured that each of the two pieces should measure the same height as the pillow by half the width of the whole pillow plus five extra inches each for the overlap. For clarity, when I say height I mean the smaller measurement, from top to bottom of the pillow, and width, obviously, is the wide measurement from side to side. So if you, unlike me, use a normal three-inch overlap for the envelope, for a pillow that is 6" tall by 12" wide (totally made up numbers), you would cut two pieces that are each six inches by nine inches - same height by half the width, which is 6", plus three, giving you nine inches for the width. I cut these two pieces so that the original hem of the polo shirt was one of the short ends. This way, no hemming is necessary - all the cut edges are positioned at seams that are being sewn together, and the hem of the original shirt serves as the finished edges at the opening of the two overlapping back pieces. I don't even know how to do hems. So, that's the back done.

For the front, I just cut out a piece that was the same size as the pillow. Now, here is one mistake I made. I wanted the case to fit snugly, not all loose and saggy, so I decided that since it is a knit, it would stretch and therefore I did not need to add any seam allowances to my measurements. This was a mistake because it turned out just a little bit too tight and difficult to put on the pillow, though it is usable with effort. I believe this is in part due to my inability to cut or sew in perfectly straight lines. I tend to have to trim fabrics a lot because the two halves that are to be sewn together are not actually lining up due to my poor cutting skills. Then, when I sew, I end up leaving a very large seam allowance, both to make up for the poor cutting and because I simply don't have good control of my fabrics as they move with the feed dogs when I'm sewing, leading me to sometimes sew off the edge and needing to correct with an oversize seam allowance. The other thing is that a pillow is not just flat pieces of fabric, it needs space to accommodate the stuffing. So, lesson learned: don't skip seam allowances when you're making pique/mesh knit pillowcases! At least when I'm the one doing the sewing, anyway.

Anyway, back to the process. So you have three pieces cut out, one for the front and two for the back. Place the the front piece right side up. Take one back piece, turn it right side down, and line up the cut edges with the cut edges on the front piece. The hem portion should NOT be lined up with a cut edge, it should run down somewhere between the center and one of the cut side edges of your front piece. Do the same with the other back piece, only the opposite way around. Meaning, place it face down and arrange so the cut ends line up with the uncovered cut edges of the front piece, the ones which the first back panel is not covering. The hemmed portion of this second back piece should be on the opposite side of the first hem part, which should now be covered by this second piece.

Pin together all the pieces, and sew carefully around all four sides of the pillow cover. I used a zigzag stitch because that is what I read you are supposed to do in order to keep seams of knit stretchy like the fabric. I have no idea if it actually works or not, or even if I did it correctly at all. There are three different buttons on my machine that have zigzaggy-looking things on them. I have no idea if the one I picked was actually the one I was supposed to use. And I know nothing about stitch length, stitch width, or tension, so I just go with random settings. Ask someone else if you need more detailed information than that. I also read that you are supposed to use a ball point needle when sewing knits, but I don't own one. Maybe I should get one. Maybe I will. Or maybe not. Who knows? Either way, you sew it all together, clip the corners, and turn right way out. Ta-da! It's a pillowcase!

My new pillowcase actually did not stay in use for long. My toddler anointed it with a vomit avalanche soon after going to bed. For the record, he did not wake up with an imprint of the fabric on his face - just vomit :(. But it was certainly very useful to have a backup pillowcase.

I would love to add some pictures to this post, but the pillowcase is still in the dryer at the moment. I do plan to add some later. Until then, here's hoping this stomach bug passes really quickly. My husband is afraid I might have to cut up another one of his polos.

Thursday, August 7, 2014

Nagorie Feather Baby Headband

So, it turns out making headbands for little baby girls is one of my favorite crafty things to do, and I'm excited to share another one today. I am really thrilled with the way this project turned out.
Have you heard of nagorie feather pads? I hadn't, till a short while ago. These are sort of like bundles of feathers glued to a felt backing in a sort of large flower petal shape, tapering at the bottom. And the edges of the feathers are curled elaborately. They come in all the colors of the rainbow and even multicolored. Some have rhinestones glued to them. Here is an example:


So these nagorie feather pads have been popping up on a lot of hair accessories lately. Mostly for babies and toddlers, but you see them for women as well. Ask Google if you want to see. Headbands with these feathers are considered couture or boutique-style headbands, and I think they are really cute. They sell for about $10 to as much as $20 on etsy and I have seen them for even more at other online retailers.  I decided to try my hand at making one or two. I ordered the feather pads off of ebay for $1.99. The pink one with rhinestones became an awesome headband for my adorable little niece (I have a lot of nieces, so there's always someone I could make hair accessories for!). Aaaaaaand, here it is!


I am in love with the way this oversized piece looks on a precious little baby head. I found this beautiful pink and white elastic at a local store and knew it would be just the perfect thing to complete this. I made the flower out of satin ribbon. I gently rolled and twisted it in a somewhat spiral but not quite so structured fashion. This post gave me the original idea for how to do this, and I experimented on my own and discovered that I could get different effects by altering the materials used, or how tightly I rolled or twisted, or whether I rolled it in a perfect spiral shape or just kind of more freehand, getting several layers of larger and smaller rolls, which is what I did here. Then, I experimented with using a warm iron to lightly press down the flower, giving a bit more sharpness and structure to the twists but not flattening it out. I liked the effect very much, but if you try this, be sure not to make the iron hot enough to melt your satin. And I stuck a large craft gem (from a 99-cent pack of 100 different gems of various colors, sizes, and shapes) on the middle of the whole thing. While the flower seems very large, it is quite loosely twisted so it is just a puffed-up piece of ribbon, and I used a plastic gem for the center, which weighs a lot less than metal or glass.  So, even though this is a large, showstopping hairpiece, it is not at all heavy on the baby's head. Some of the ones I have seen for sale use large, elaborate metal buttons or even vintage brooches, which seems to me like they must be way too heavy for a baby to wear comfortably, not to mention the weight pulling the whole thing down over the baby's eyes. This one doesn't do that!
It may be difficult to tell from the picture, but I also did a tulle layer to accent the flower. I basically just cut a bunch of 1 1/2 inch tulle strips longer than the width of the flower and arranged them like overlapping spokes of a wheel, gluing at the centers. This went underneath the flower.

I find it difficult to sew elastic, so I usually hot-glue the ends together, overlapping slightly. I glue the elastic to the embellishment with the seam part of the elastic at the felt underside of the flower or whatever I'm making. Then I glue another piece of felt on top of that, sticking to both the elastic and the underside of the flowers, so the elastic seam is sandwiched between the two pieces of felt. It is very secure and looks so clean that way. Also it's smoother and probably more comfortable on the baby's head. The elastic is nice and stretchy, so even though I made it to measure for a three-month-old, it will probably fit at least through baby's first year. DONE!

And here is a cute little person to model it for you.


No babies were available, but I think it works great for a toddler, too!
In a future post, I will share a more grown-up version of a nagorie feather headband I made with the other pad I bought.

Tuesday, February 25, 2014

Fancy French Fabric Flower, aka Rose Tutorial Translation

Scouting online for some more flower tutorials, I came across a photo of a flower I loved, and I really wanted to make it. But it turns out the blog it comes from is in French. Using Google Translate, it's hard to follow the instructions because a lot of it makes no sense. The sentence structure is all mixed up, and also what I think happens is that some of the words have multiple meanings and the wrong one is used in the translation, making a whole lot of nonsense. So I tried to redo the tutorial in English. I'm pretty much a blogging newbie, but I'm assuming this is ok to do as long as I am giving proper credit and linking back to the blog it originally came from. All photos, except for the very last one, come from the blog Les dentelles de Segolene

First, you need 9 circles of somewhat stiff (or stiffened) fabric 4" in diameter and 3 of  2.75" in diameter.


Start making the heart of the flower. Fold the smaller circles in half and pin them shut. 


Place one folded circle on top of another at a right angle, and repeat with the third circle.


Next, stick the free end of the top piece underneath the piece near it, so all the pieces overlap, like when you fold the flaps of a cardboard box, only with three flaps instead of four. This will cause the center to point up a little, forming a small hill shape. 


Now take a needle and thread and run a basting stitch all around the bottom edge of your hill, making sure to catch all of the layers of fabric as you go.


Then pull one end of the thread to tightly gather the bottom, and tuck it in towards the center, similar to when you make a fabric yo-yo.


This is how the top will look.


Knot the thread in place, cut off excess, and the bud part, or the heart, of your rose is finished. Moving on...

Take four of your large circles and fold them in half as you did with the small ones. Lay each one on top of another at a right angle, cut edges lined up, so they all overlap to form a new circle. Then gather the edge of the circle they form and tuck it in just as you did before, only don't gather quite so tightly, as seen in the photo below on the left.
 Now, in the photo on the right, we see that the folded edges of the overlapping quarters you made are folded over a little bit toward the outer edges of the flower, giving the petals some dimension. I think that these folds would hold better if they were made before the gathering stitch is sewn. This way, you could catch the fold in your stitches as you are basting for gathering so they are secure and don't open. I hope this makes sense, it's kind of hard to explain.


 .Then place this part over the center you made before, letting the center peek out a little bit from the center opening. Stitch or glue in place, taking care to place glue or stitches where they won't show.


Now, at this point you can leave it at this, or add petals to make a larger rose.

For the petals, fold the remaining circles in half. Use pins to fold the two sides of the semicircle inward, then make a little dart down the middle of it, starting from the round cut age and going about 3/4 of the way down toward the fold edge, but not all the way there, and stitch in place, as the picture shows. 


Stitch and gather lightly along the cut edge, curving the upper and outer edges inwards with the pleats and folds on the outside of the curve. Kind of like a hunchback with a sail sticking out of his back!


Overlap the petals all around the flower and stitch or glue in place. Here's how the bottom should look...


...and here's the finished rose!


You can glue a felt circle to the bottom to secure and hide all the stitching.

So cute in different fabrics!


Thank you Les dentelles de Segollene blog for the awesome photos, and I hope the instructions make it all clear and easy to follow!

And of course I had to test-drive the tutorial myself to see if it works, so here's my version. Nowhere near as pretty or neat as the one in the blogger's photos, but that I attribute to my abysmal sewing skills and possibly my poor choice of fabrics, as mine was not really stiff. And my outer petals were probably folded in too much and gathered too tight, so they are kind of narrow and it looks as if there aren't enough of them.


Also, I confess to using absolutely no pins at all during any part of this process. That's just how I roll :)


Thursday, February 6, 2014

A Food Post: Yummy No-Bake Creamy Chocolate Chip Cheesecake in a Mug

Nothing of major craftiness here today, but I'm loving a new indulgent snack I've concocted and I just gotta talk about it. I was craving cheesecake but had neither the inclination nor the ingredients to actually bake some, so I set out to come up with something crave-worthy. What I ended up with was loosely based on this recipe for Chocolate Chip Cheesecake Dip posted by Cyclone Mommy on Food.com, reduced to the size of my craving only with no leftovers. Here's what I did: I took my cream cheese and butter out of the fridge to let them soften for a while. I then microwaved 2 tablespoons of butter in a deep glass mug till it was melted. I added 2 ounces of cream cheese, stirred it all together till it was smooth. I had some lumps so I stuck it all back in the microwave for just a few seconds and then it came together nicely. After that, I stirred in 1/4 cup powdered sugar and 1 1/2 teaspoons brown sugar. When smooth, I added a scant 1/4 teaspoon vanilla extract. I let the stuff cool and then when it was no longer warm I stirred in 1/4 cup of the teeny-tiny mini chocolate chips. I let it get nice and cold in the fridge, then I grabbed a spoon and dug in. It was yum. Totally satisfied the cheesecake craving. My husband passed by, I served him a spoonful, and he stayed right there until it was all gone :). So I definitely wanna file this one away for future cheesecake emergencies. I'm thinking it would go well on a tea biscuit or maybe graham cracker stick. Or just on a spoon, like I had it. That's great too. So here's the whole recipe:

No-Bake Creamy Chocolate Chip Cheesecake for One
aka First Aid for Cheesecake Cravings

2 tablespoons butter
2 ounces cream cheese
1/4 cup powdered sugar
1 1/2 teaspoons brown sugar
scant 1/4 teaspoon vanilla extract
1/4 cup mini chocolate chips

Bring butter and cream cheese to room temperature. Melt butter in tall mug in microwave. Add cream cheese. Microwave again for a few seconds if too hard to blend smoothly. Add sugars and vanilla, stir until smooth. Cool to room temperature, stir in chocolate chips. Refrigerate. When cold, enjoy! Try with fruit, cookies, graham crackers...

Tuesday, January 28, 2014

Another Baby Headband


Fair warning: This is going to be a pretty long post. I guess I just have a lot to share today, and a lot of that requires background information to explain it properly. So here goes...you've been warned!
Been working on a few new hair accessories lately and some other projects I haven't got around to posting yet. First off I want to share a cute little headband I made for my adorable baby niece because I already have pics uploaded for that. The reason for that is twofold: number one, one of my kids has a performance coming up at school and I needed to clear space on my memory card to record it, which is how come I had to upload all the pics on my SD card to the computer. But the second, and SUPER EXCITING reason, is because I finally got a new laptop! Woohoo! Just so you understand how huge this is, allow me to provide some background. When my ancient desktop died of old age several years ago, I couldn't afford a new one. I was lucky to get a laptop gifted by a very special person who got a new one and didn't need the old one any more. I have been using that for the past few years and it's been through a lot with me. Spills, crumbs, drops, and two babies who liked to sit on my lap all day long while using it. At some point, the battery quit working and it could only be used while plugged in. Then the cord got ruined, fixed up with electrical tape, ruined again, fixed again, ruined again fixed again, several times until I had no choice but to order a cheap new Chinese power pack off of ebay. The little metal thingy that goes into the hole in the computer (correct terminology sadly eludes me) to connect to power did not fit tightly in the hole, so you had to be really careful lest it moved slightly and you cut power to the computer. Happened several times. Then I scored a used but name brand factory original power supply from someone who was way past using computers of advanced age and no longer needed it. The kids attacked the keys several times over the years and quite a few were broken and could not be replaced, so I have been living without a space bar, window key, number four, and several letters for a long time. That computer also does not have a memory card slot, so in order to upload pics, I had to pull out a separate memory card reader that consisted of two parts that had to be fitted together and then plugged into the computer. This reader was getting on in years, so it was tricky getting it to communicate with the computer, and then you had to hope the connection would not be suddenly dropped while using it. Plus there was always the danger one of the kids would pass by and pull on the thing, aborting the whole process right in the middle of it. And, it took FOREVEEEEERRRRRR. So you see why I hated it so much, right? Best of all, my old laptop is still running....wait for it...drumroll please....WINDOWS XP! For realz. So...yeah. By the way, XP is my favorite operating system ever. I still love it and I don't think I missed out on anything by skipping Windows 7. I used 7 frequently at my mom's house and I totally prefer XP over that. Bite me. Anyway, three years ago I started saving up for a new laptop. Bit by bit, slowly slowly. I did not want to just buy some cheapy thing the minute I could afford it...I don't buy laptops every day (you got that from this post already, right?) and whatever I get had to be up-to-date enough to last me several years at least. So I knew I needed a fairly reasonable budget to work with. Finally this year I was able to take advantage of some really great holiday season sales and now I'm working Windows 8.1 on my sleek new compu-buddy as we speak. It has a nifty little memory card reader hidden right inside its shiny new body and the process is now painless, so I can cautiously tell you to expect an increase in pictures moving forward. No promises, though! Anyhoo, back to business. The headband I made for my niece - great-niece, actually; her mom's my actual niece - is made of charcoal grey felt and has two cute little flowers on a narrow black elastic band.


 I'm not sure how well you can see because it's such a dark color, but they are two different types of flowers on there. The one on the left, it looks like a wild rose to me, came about after much trial and error. I was desperate to make a pretty little rose, and collected several tutorials from around the web. But none of the styles I tried came out looking anything like the picture. I couldn't possibly allow anything so flawed to touch that sweet baby's head, so I kept trying. Finally, I came upon THIS one, and I felt like I'd hit the jackpot when it actually WORKED. I added a lighter grey leaf at the edge of it which I just freehand cut out of a piece of fake grey leather I had lying around from an old school project one of my kids brought home a long time ago (no they did not mind getting rid of the project and harvesting its usable body parts, I would never destroy something precious to a child). The other flower is actually modeled after a store-bought headband I have. I cut a wide strip of felt, folded in half lengthwise to create a narrower strip, and cut little horizontal slits about 3/4 of the way through the width of the folded strip at equal intervals all along the fold line. Just like this (right edge is folded edge):


 Then I just rolled up the folded strip, gluing along the edge without the slits. I then turned a little scrap of striped grey and white fabric into two little leaf-triangles just by folding and gluing under the edges. When I put the two flowers together side by side, I decided it needed a third, larger leaf on the side from the same grey faux leather as the rose. I glued the leaves to the backs of both flowers and glued the flowers to a wide strip of felt. I used a plain adult-sized black elastic headband from a multi-pack (either from Goody or scunci, can't remember which) and cut it down to size. I glued the open edges to the bottom of the felt strip that had the flowers on it, added extra glue for reinforcement all over the top of the seam, and then glued an identical strip over the elastic, sandwiching the edges in between the two pieces of felt. Aaaaaaaaand, done! I would love to post a picture of my niece wearing this headband, but unfortunately she was being a diva and refused to let me get a good one. I think she wanted me to bribe her, like with diamonds or something. But I was too afraid she might swallow them, being only seven months old. Ha! Whatever, you'll have to take my word for it - it looks really, really cute.


Wednesday, October 9, 2013

"Big Kid's" Pink Couture-Style Headband

Ok, this time I REALLY did it. For real. I produced something that I am really proud of and (probably) saved myself a whole lot of money to boot. You know those gorgeous couture headbands they sell for the adornment of females from birth and on up? The really big ones, with clusters of all manner of wonderfully constructed fabric flowers accented by things like pearls, gems, lace, feathers, marabou and any other sort of prettiness you can imagine? The kind of thing that features prominently in newborn photography and seems to be under strict regulations to be larger than the baby's head, taking all attention away from the actual baby and consequently begging this question: why go to the trouble of undressing the baby, taking the risk of all surroundings getting soaked in a warm and non-cleansing liquid, getting the baby to fall deeply enough asleep so she will lie still in all sorts of unnaturally contorted positions on top of or inside all sorts of odd objects of all sorts of odd shapes, colors, and textures, often perched in ways that appear frighteningly precarious, as appears to be de riguer these days, merely for the sake of getting the oblivious baby in the picture when all you really want is the ginormous HEADBAND??? Raise your hand if you're still with me, because I'm not quite sure what it was I was originally talking about at the beginning of the world's longest run on sentence.
So anyway, if you still don't know what I mean, just google images of couture headbands. You're bound to figure it out quickly, if eye-poppingly. Google RULES, y'all. These things are trendy, and mostly expensive. I've seen some over $40! For a single hair accessory! Insane, right? But...but...but...I wanted one! Because I like to be trendy. No, scratch that. My wardrobe is a cross between an elderly toad and an explosion of black shapelessness. But, man, I like my offspring to be trendily dressed. Oh how I care about their appearance. Rather foolishly, I imagine, because all THEY seem to care about is comfort, playing in the dirt, and colorful ice pops. See where this is going. Yeah, obviously I ought to just keep them in soft dark-colored garments at all times, and often I do, though I try to ensure, as much as possible, that those are stylish and nice-looking soft dark-colored garments. But I do so love to deck them out all spiffy on occasion. So, lacking a tiny moldable girl baby of my own, I determined that my half-grown girl child must have a gorgeously decorated headband, which, while not quite outshining her entire head in size, could be constructed to come rather close.
So I spent some time planning this (okay, full disclosure: I spent an insane amount of time googling approximately three gazillion pictures and tutorials until I finally made up my mind on what, exactly I wanted it to look like and then attempted to reconcile that with what I felt I was capable of creating). But then I got to work, and after a full set of burnt fingers, a couple of mess-ups, frustrated stomping-offs, and subsequent re-dos, I DID IT! I copied the experts and produced something that is, in my humble opinion, awesome. And I am just so totally blown away by my own awesomeness as the creator of such, well, awesomeness. And may I tell you, (I'm not really asking permission here, despite how it may seem) I used only a few pieces of ribbon, a headband, some beads, feathers, lace trim, felt, a lot of hot glue, and that aforementioned set of burnt fingers to accomplish this, although admittedly said fingers were not, in fact, burnt, at the beginning of this project. I'll leave you to figure that out with your awesome (there's that word again) sleuthing skills. You will notice (or I will make sure you do)  that I did not mention the word "flowers" in that list of supplies. That is because I did not use any. While my design prominently features four, count 'em, four lovely blossoming blooms of varying colors, styles, and sizes, I did not buy even one of them ready-made. I want you to know that I actually made all of these flowers all by my little old self, and I can hardly believe they turned out at all. And because I am so absolutely insanely proud of my handiwork, this time you get a picture. Make that two pictures. But being of the cell-phone variety, the quality of them is not very good. Still, my work is thus preserved for all time, come what may. Also, I wish to assure you that it looks significantly lovelier upon my darling's precious head than it does perched on top of the unfinished wooden banister post, but the darlings are currently gainfully employed at their place of education, which is the one crucial factor that enables the crafting and subsequent blogging to occur at all.


Come, now, you must admit that this is a fairly nice piece of work, especially for this admittedly non-crafty crafter. And, well, I myself love how my kiddo looks in it, so there's that. But most of all, my (big) little girl feels like a princess in it, and that's really all that matters, isn't it? Meh, who am I kidding.
Off to call the newborn photographer.


Updated 2/2014 with a somewhat better picture, of the non-cell phone variety:


Wednesday, July 17, 2013

Pink Satin Flower Headband

Yesterday I produced something so cute I can't stop looking at it and smiling. I made a yummy little headband for my tiny niece. I made a satin flower headband, in princessly pink of course. (What? I have just as much right to make up adjectives as the next person, y'all!) I found the most gorgeous pale pink super-soft elastic with a decorative twist running down the center while browsing at the store for ribbons. I don't know what it's actually intended to be used for, but it was calling my name and demanding to encircle a precious soft little baby head, so home it went. Then I kept it lying around for a while because I just couldn't decide what would be special enough to top something so pretty. Yesterday I finally got down to it and just did it.
 I used this tutorial as the basic idea for how to construct the flowers. You cut out circles, uneven is fine, and then you use an open flame to melt the edges so they stiffen and start to curl. It seems most people use a lighter as their heat source, but I don't keep lighters around the house and always use a tealight for such purposes. It's also handy when using grosgrain ribbon for anything, to seal the cut edges so they don't fray. Now I want to point out something that wasn't clear to me from the tutorial. If you hold the circle so the outer rim is nearest to the flame, the edge will harden and maybe shrink if held long enough, but it won't really curl up into the bowl shape you are aiming for. Good for sealing edges of things you want to keep flat so they don't fray. If you want the edges to curl up, you need to hold it so that the part of the circle that is on the bottom and on the edge is nearest the flame. So figure out which side of your satin, if it's different on both sides (mine had a more shiny side), you want to have showing at the top of your flower, and hold the bottom of the fabric so it faces the heat source. I like to make use of the side of the flame as opposed to the top, because I find it easier to avoid burning myself, so I'll hold my fabric by the side of the flame, not above it. You want to have the outer edge of the BOTTOM part of the circle turned to face the flame, not the actual outer edge of the circle. So you are melting a ring shaped area on the outer edge of the bottom of your satin circle. Make sense?
 I changed it up in a few ways. I used a soft pink satin ribbon, very wide, because I didn't have any satin fabric. I used fewer layers than the picture shows, and I burnt them for a short enough amount of time so that they they didn't get quite as curled up as on the photos in the tutorial. I felt this gave it a softer, daintier look, since it's for such a tiny princess. In the center, I glued on one of the pearls I bought on my trip to Michael's. I was going to use a large one, but when I tried it out, I felt the smaller one looked better. My kids agreed, so that's the one that went on. I also didn't bother with the leaves. I wanted more of a clean, minimalist look for this. I don't know why. But I'm glad it worked out.
I cut a piece of the pretty pink elastic 3/4 inch larger than the baby's head measurement. This turned out to be 15 inches, which happens to be a typical size for most newborn headbands, as I discovered from snooping about online a bit. I sealed the cut edges by melting with my trusty tealight. Then I sewed them together with a 1/4 inch overlap. I'm hoping I made it large enough to still fit her for a little while yet as she grows. I think it will, because the elastic is so soft that it's pretty stretchy without being constricting when stretched. Come to think of it, it might be just a tiny bit loose on her for now. Oh well, if it is she'll grow into it. So I hot-glued the flower right on top of the seam, then glued a felt circle under the elastic and to the underside of the flower to sandwich the elastic between the circle and the flower. This way, it lays nice and soft and smooth against her little noggin, with no bumps or rough areas to irritate her, and none of the glue or stitching shows. Maybe one of these days if I can overcome my aversion to uploading photos I'll post a picture, because I'm just so thrilled with the way it turned out.

Monday, July 15, 2013

I Took the Plunge

I finally took the plunge and bought some fabric for upcoming sewing projects. Until now, all I used were scraps of clothing and bedding that were going to be gotten rid of otherwise. Repurposing is great, but some times you just need to pick out a brand spanking new piece of cloth. I haven't been willing to spend money on fabric when my previous sewing projects were just for learning or practice. I didn't want to risk wasting the money if the project were to turn out to be a flop. I didn't know if I was capable of producing anything usable. But now, I think I might be there. To me, this is validation that I have finally learned to operate a sewing machine capably enough to construct a brand new garment that my kids can actually wear out in public.  I decided it was now or never, and mustered up the confidence to go pick something out for me to sew.
The project I decided to attempt was a pillowcase dress for my daughter.  I figured that was simple enough for me to manage and easygoing enough that my small errors wouldn't be a catastrophe. And let's not forgot, they are so, so cute and fashionable right now.
Browsing in the fabric store was delightful.  I spent an inordinate time in the store looking at and feeling the different beautiful fabrics before making my selection. My original thought was to use a denim or chambray type of fabric, and use navy blue ribbon. Then I thought perhaps a nice floral would do. And then I spotted some pretty seersuckers, and thought I could do something with that. I finally settled on a lovely piece of grey and white seersucker with extra thin stripes, to be paired with white ribbon for the shoulder straps. Then a light bulb went off in my head: I could do the dress for my daughter and use the same fabric to whip up some matching elastic-waist shorts for my boys to wear with white polos! What a cute family portrait that would make! I plan to get started ASAP. I'll let you know how it all turns out. I'm so excited about this project and really hope I don't mess it up.

A Crafty Shopping Trip

Yesterday I spoiled myself a little bit. I made a trip to Michael's craft store to find supplies for my crafting projects. I try not to spend much money on my hobbies at all, so everything I bought was within strict limits. I love going to craft stores. I feel like I'm in a toy store for grownups. I just want to buy everything and try everything all at once. So I try to buy only stuff that can be used to make actual useful items. I'm not on the financial level to make art just for art's sake, so I'm going with things that can actually save me money on something I'd otherwise have to buy ready at the store at this point. If I buy it, it's got to serve a purpose, and I prefer if that purpose is more than just decorative. I'm not yet a skilled enough crafter that I'd want to decorate my home with stuff I've made myself, and when you're on a budget, useful ought to come before decorative. So I would buy supplies to create or embellish clothing for my children to actually wear, but not stuff like polymer clay, which I love working with, but serves no practical purpose.
So what did I actually buy? First of all I bought some elastic, as I've got some sewing projects in the works, which I'll share later on. Also, I bought a navy blue Sharpie marker. I wanted a fabric marker, truthfully, but I couldn't find a navy blue colored one that wasn't part of a larger multipack, which cost more than I was willing to spend when I just needed the one color. I needed it for two reasons, one because I have an awesome shirt embellishment project in mind to use it for, and two because I had a little bleach spatter accident involving my son's best pair of navy blue shorts and I'm hoping to use the marker to repair that damage and save the shorts. I hate hate hate bleach and try to avoid using it at all costs. The smell makes me nauseous and no matter how careful I try to be, I seem to come to grief very frequently when using it. But in this case it was unavoidable, hence the nasty byproduct.
I also bought some tiny jewelry making parts (findings) called crimps. These are little metal tubes used to seal off the ends of beaded jewelry so the beads don't fall off the wire or cord. You slip them over the wire and pinch them closed with a special tool that creates a groove down the center and then pinches the two upper edges of the groove together so it's a round tube again, with the wire pinched in the groove at the center of it. I have some beaded pieces that have fallen apart, and I'm thinking that this way I can repair them by myself rather than throw them out or have them done by a professional repair place.
I had so many other items in my shopping cart as I walked around the store, but before checking out I forced myself to give up some of my project ideas and pare down to the bare minimum. There were some things on my shopping list that I didn't end up finding, so I'll have to go somewhere else if I want to use those things. But I did buy some things I was planning NOT to buy. I was checking out the clearance aisle and there were some rolls of colorful striped ribbon on sale for $.49 a roll, so I bought two, a wider one and a narrower one. I know they'll make adorable hair accessories. Then, I found myself in the ribbon aisle. I was going to pass right through, because I have a nice stash at home now, but then I happened to notice 3/8" wide grosgrain ribbon in many colors on a 10 yard roll for $2. At my local trimming store, this kind of ribbon sells for $.85 a yard. Ribbon is something I use a lot lately, since I like kids' hair accessories to match the outfit they're wearing, and bows and such tend to be really expensive - $4 for a simple grosgrain ribbon bow, and upwards from there, at least around where I live. As mentioned previously, I'm working on learning to do ribbon sculptures, and have also done quite a few bows and flowers with ribbon. So ribbon gets used a lot, and at that price, I wasn't going to leave it there. I originally snatched four rolls, but one must have stayed behind in the shopping cart, because I didn't find it when I got home and unpacked, and the receipt shows I only paid for 3 rolls. Too bad.
I also got a little package of fake pearls in different sizes. I plan to use them as centers for fabric flowers. Ditto for a pack of rhinestones. I also got two more sheets of felt, in white and pink, for making hair accessories and other stuff. My local store sells them for $.69 a sheet, here I got them for $.33. And they are a nice heftier variety than the type I've bought before. I also threw in a roll of double-sided scotch tape, useful for so many things.
One crafty thing I've done quite a few of is woven friendship bracelets, also called macrame. These are made by knotting colored cord in different patterns to create different designs. I learned to do it last year and found it very enjoyable, and a relaxing way to kill time, especially on long car rides and other situations where I tend to get edgy. I use the method to create other things as well as bracelets. I made a wide chevron patterned one to use as a pacifier holder for my baby, for example. I also think they would make great shoulder straps for handbags, belts, shoelaces, and headbands. I'm been planning to teach my daughter to make them also. I  think maybe by now she might just be old enough. I like to use colorful six-strand cotton embroidery thread for my designs, and on my shopping trip I found a package of 34 skeins of thread in tons of colors for $3.99. I've already started a bracelet to match my daughter's new purple t-shirt. It's a plain, basic candy stripe, the first type you usually learn, but with a nice pattern I thought would look really interesting. Six strands, two dark purple, two light purple, one black, one white. I'm doing the two purple rows near each other, resulting in one wide purple band. then one black, then one wide light purple, then one white. Looks cool so far!
I also (finally!) bought some fusible adhesive. I've wanted this for a long time, and have a few uses in mind for it. My local store doesn't carry it at all. In addition, I bought a gorgeous cream-colored burlap flower clip, just because I loved it. Some people splurge on shoes, clothes, or jewelry...this was mine. For $2.99, I don't think it was unreasonable. It'll make a nice hair accessory.
I also picked up some goodies for the kids - a pack of initialed notecards with  matching envelopes for my daughter to write letters on, and some washable watercolor paints for my son. He's been desperate to paint ever since my mother-in-law sent my daughter an art kit containing watercolors. I wouldn't let him try them because I don't trust him with non-washable paints, and though he got his own present, all he has wanted was to paint like his sister. And now everyone's happy.

More Hair Clips

I made two cute little hair accessories yesterday. One was a simple black ribbon twisted into a military braid with the ends tucked in. I glued it to a plain snap clip, using a piece of rubber shelf liner for no-slip grip on the inside, of course (see previous hair accessory post for more on this). In the curves of the outer edges of the braid as well as in the center of the two ends of it, I stuck some big rhinestones. It looks nice, though I would have preferred smaller ones. But I had to use what I had. It still looks pretty in the hair, though I did not do a very neat job and had a lot of glue drips to pick off, not all of which were willing to separate from the ribbon. I colored over the stubborn ones with a black Sharpie, and that made them somewhat less obvious. Oh well, I'm not selling these or anything, so if it's not perfect, chalk it up to practice, right?


The other clip I made was a red and white candy in a wrapper. In the lollipop and candy clip tutorial I linked to in an earlier post, it instructs you to use several colors of ribbon and roll them together as a spiral. I felt I could do better. When all the ribbons are rolled together and all you see is the thin edges of them, it really takes away from the effect of the colors. So I decided to improve on this. I prefer to use just two colors for a really sharp contrast, and stack two pieces of the same colored ribbon before rolling, instead of using four colors of ribbon. So I put a white ribbon on top of another white ribbon, then a red ribbon on top of them and another red on top of those. In this way, when I roll the spiral, the stripe of each color is twice as thick and therefore shows up more. You can actually see a swirl of two colors, instead of tiny bits of color all jumbled together that look like one dull color when you don't look at it from close up. I wrapped my pretty candy in a piece of wide sheer organza ribbon just as an edible candy would be wrapped in clear cellophane. I used a piece of white thread to knot around the two ends to create the typical twisted wrapper edge, knotting the thread tightly and trimming the excess so it's invisible. A dot of hot glue made this easier. Since I was using ribbon and not fabric, I didn't need to do anything to prevent the upper and lower edges of the candy wrapper from fraying. For the two cut ends, I brushed on some clear nail polish to prevent them from unraveling, something organza does very easily. Trim the edges and hanging threads, stick on a white-covered clip, and voila! Sweet enough to eat!
I will try to remember to upload a picture of that one.

Friday, July 12, 2013

Sewing for My Boy - Stuffed Friend from a Child's Drawing

My son wanted me to sew something for him, too. He brought me a drawing of some kind of person or monster creature, and asked that I make him a doll that looked just like it. This tutorial helped make it happen. The original drawing was very small and I wanted to be able to actually trace around the picture for accuracy, so I asked my son to draw a picture as large as a sheet of copy paper. He did and I cut it out and used it as a template. He wanted it blue, so I cut the pieces out of navy blue felt. The character has lopsided eyes made from mismatched buttons, a red felt mouth, and a triangular nose made halfway of blue and white gingham fabric and halfway of red and purple print. I topstitched all around the nose and down the center dividing line between the two different fabric halves with pink thread (because that's what was loaded in the machine and I was lazy to change it) using a tight zigzag buttonhole type stitch. I know it's a buttonhole stitch only because the button on the sewing machine that produces this stitch has a drawing of a button on it, but I really know absolutely nothing about making buttonholes. I would love to learn, thought, because it seems like it would be useful if I'm actually going to be making a variety of clothing. My son did not mind the pink thread at all, he actually loves pink. None of this detail was based on my own creativity at all, as I was working from a drawing, so any lines or seams are based on what the drawing showed. But he did not color the picture, which was a good thing because then I could use whatever fabrics and colors I had available. When sewing together the front and back of the doll, I left the top of the head open to put the stuffing in. I then made several zigzag seams from contrasting red thread to both close the gap and serve as hair. I did not have any batting to stuff the little guy with, so I got creative. Remember in the previous post I told you about those bed sheets I had that had gotten very thinned and worn out over time? Well, I cut them up to little pieces and crumpled them up to use as stuffing for my son's little friend. I also add a bit of dryer lint - it's clean, so why not recycle?
The funny thing was, when my husband first saw what I'd made, he had some criticism - he wanted to know why I had made the head so lopsided, the eyes mismatched, etc. Why hadn't I straightened the details that didn't turn out nice on the drawing? I explained to him that our son wanted me to copy what he'd drawn, and that's what I'd done. But his theory was, our son is just a little kid, and obviously his drawings aren't going to be perfect, but that didn't mean he wouldn't want them to be. He drew mismatched eyes not because he wanted a doll with lopsided eyes but because that was all he could manage, and I should have understood that and done a better job than he had. But it was done, and I wasn't going to redo it.  We'd just have to see what the kid said. Well, when I showed our son the doll, the first thing he did was ask where his drawing was. I gave it back to him, and he immediately laid the doll on top of the picture to see if the shapes matched. I could see him comparing the features of both. Then he wanted to know why the doll lacked an odd random corner he'd drawn into one side! Ha! I explained to him that I'd tried, but I'm not that good at sewing and the corner turned out more like a curve after I'd sewn the two halves together. Satisfied that everything else was in perfect order, EXACTLY as he'd drawn it, he fell in love with his new friend, talking to it, and carrying it around everywhere. Score one for Mama!

Peasant Dress-style Nightgown

Continuing my adventures in sewing, I was brainstorming what to do with some old bed linens I had lying around. It was a complete set with twin sheet, pillowcase and duvet cover for two beds, and the fitted sheets were all worn out, thin and getting holey. I figured the rest of the pieces would make great free fabric to practice my sewing on, without having wasted money if anything turned out to be a total flop. It's the kind of fabric that I can't really see anyone actually wearing as clothing, as it just looks so...I don't know, "beddingy". So I thought of making sleepwear out of it. A nightgown for my daughter sounded like a great way to practice making dresses later on. I asked her about it, and she was really excited to give me her specifications for how she would like it to look. She made sure to request that I make it larger than her normal size so she could wear it next year, too. I based the style on this tutorial, of course with my own twists. I made the neck opening smaller, and made the gown long enough to brush the floor, because my little girl informed me that that would make it truly princesslike. She also requested short sleeves, and bows or roses on the sleeves and front. I obliged with little sleeves just above the elbow, with a ruffled edge. I did that by sewing a seam all around about 3/4" from the edge of the sleeve with elastic thread loaded in the bobbin, using a zigzag stitch. This is a something I learned about on the make it and love it site, where she teaches how to shirr fabrics this way. I would have never thought the machine could sew with the thicker elastic thread, if I hadn't seen it there. I decided to see if I could use it to form the sleeve ruffle, and amazingly, it worked. I then sewed on the sides of the sleeves, on top of the ruffling seams, a little pink bow made from grosgrain ribbon, and left the streamers hanging long, which delighted my daughter. On one side of the chest area, I sewed on a little fabric flower made by folding a fabric strip in half lengthwise, joining the cut edges with a long basting stitch, pulling the threads to gather the strip into a ruffle, and rolling the ruffle into a medium-tight spiral. These are things I learned to do by reading about them in various places around the web, so I can't credit any one site with them. Sometimes you learn a concept from one place, master the first step from another, but need yet a third to explain the following steps in a way that crystallizes in your brain. Know what I mean?
Another thing I did with the nighty was to cut my fabric in such a way as to use the selvage edge as the edge of both the bottom hem and the bottom of the sleeves, which eliminates the need to hem anything. That's because I hate hemming. It takes me forever and I don't really know what I'm doing and I'm horrible at it. I was lucky that my fabric, after unpicking the duvet covers, didn't have a visible selvage edge - it was just kind of sealed for 1/4" at the edge but the original print continued to the end of the selvage, if that makes sense. So all I had to do was iron the edges because the selvages were folded inward, and I had professionally finished edges all ready to go.
I must say that for me, the hardest part of the whole thing was measuring and cutting out the fabric. For some reason I always have a hard time with this part. The pieces always move around and the edges don't cut straight. And I can't seem to draw straight lines. So it took a really long time to get it all done, but I did it.
The idea to do a peasant dress as sleepwear came to me from those doll catalogs I used to obsessively pore over as a little girl. One of the dolls had a nightgown you could buy that was sewn in just such a style. It was white, or perhaps, off-white, and had a small red bow at the neck with the streamers hanging down. When I stumbled on the peasant dress tutorial online, it brought back memories of that little doll in her little nightgown in the catalog, and I thought I might just be able to make that happen.
I confess I made the nightgown a bit too long as it's even longer than floor length, but I categorically refuse to hem and my girl says she's happy it'll fit her for a longer time, so it's all good. I figure she's only going to sleep in it, as we don't walk around in our pj's all day (or even half the day) in this house, so there's little opportunity for her to trip. And if she does trip, and it bothers her, she can always put it away to grow into, right?