Lately, most of the crafting I've been doing has been of the kitchen variety. I've kind of been on a new-recipe-trying kick. I've been feeling the winter blues and wanted to shake things up a little, henceforth all this experimentation. Some have turned out better than others...and some were, er, not quite up to par. These cupcakes did not turn out quite perfect, but I thought they were so cute, I want to share them anyway.

I needed to make cupcakes for a Big Cats themed party. So I tried to cram in as many as I could get into one cupcake. I made lion-topped cupcakes in leopard-printed liners...with tiger stripes on the inside!
The recipe I used came from here. The author took the recipe from another site, where it was posted as a single large cake, and she turned the into cupcakes. I further adapted it for my own purposes.
Are you familiar with zebra cakes? These are cakes that get a striped effect on the inside via a special batter pouring technique. You divide your plain or vanilla flavored cake batter in two, and usually leave one half as is and make the other half a different color and often a different flavor. Commonly, this is done by adding cocoa powder. Then you use a piping bag or soup ladle to pour concentric circles of the different colors on top of each other, which creates the striped effect. Zebra cake batters can't be too thick, or it won't work. I have also seen them done with cheesecake batter. Zebra cheesecake, with white and dark chocolate stripes, happens to be my husband's favorite dessert. Some even go so far as to use three or more colors, using food coloring to create a rainbow of stripes in whatever colors you can imagine. But that is a fairly different effect than the alternating striped look.
For my cupcakes, I wanted orange and black tiger stripes, so I colored half of my mixture with red and yellow food coloring to create orange, and added dark cocoa powder to the other half. Then I felt it was still too brown, so I added black food coloring to deepen the color. It was pretty much jet black after that, just as I wanted.
I had a slight mishap as I was mixing the colors. The batter was already a pale yellow color from the eggs, so I just added a little bit of yellow food coloring to deepen the yellow. But when I went to add a few drops of red to make it orange, disaster struck. First, I realized that the tube of red food coloring I was squeezing into the batter was actually writing icing!

WHY do they come in identical tubes where the outside of the tube says only what color it is, not what product is actually inside?!? I had bought four-color packs of both icing and food coloring gel, and the tubes all looked identical. The boxes they came in did obviously state what was inside, but the boxes had long been ruined and I was keeping the tubes of icing and food coloring in separate plastic bags. Somehow, the red icing tube must have mistakenly been put in the bag of food coloring.
I now had no red food coloring gel, and going out to the store wasn't an option. I did, however, have a bottle of red liquid food coloring, so my only choice was to use that. Unfortunately, I decided to pour a drop or two straight from the bottle instead of pouring it on a spoon first, and my control of liquids from tiny bottles is clearly not as good as I imagined it was, because several large drops slipped out and dyed my batter red. Uh-oh. Only one thing left to do. I attempted to fix the mistake by adding more yellow to make up for the excess red. I squeezed in whatever was left in the yellow gel tube. No change. I then turned to my bottle of yellow liquid food coloring. A few drops, then a few more...and then the entire bottle, which was brand new. Still no change. That red is just so much stronger than the yellow! I found a second bottle of yellow food coloring in the cupboard. I poured and poured until I had emptied the second bottle. It finally started to make an impact. My batter was now dark reddish orange and I had no more food coloring, so it would have to do.
But now I had another issue. The recipe lists a range of how much cocoa you can add to the brown batter. I used the maximum amount, 5 tablespoons. That amount thickened the mixture quite a bit, and the thick paste food coloring I added to make it blacker did not thin it out any. It could not even be piped easily. But the orange mixture had two full bottles of liquid food coloring in it, which made it much more liquid. If the two mixtures are very different in weight or texture, the stripes won't turn out right. I needed to thin the black mixture with a decent amount of water, I'm not sure how much. It still wasn't quite as thin as the orange mixture, but I was afraid to mess with it any more.
Most zebra cake recipes tell you to either squeeze the batter out of a piping bag to form the cake, or use a soup ladle. This helps you control how the batter comes out so you can get nice stripes. I opted to use my trusty squeeze bottles. I have several soft plastic squeeze bottles made by Wilton. They come in handy for many things.
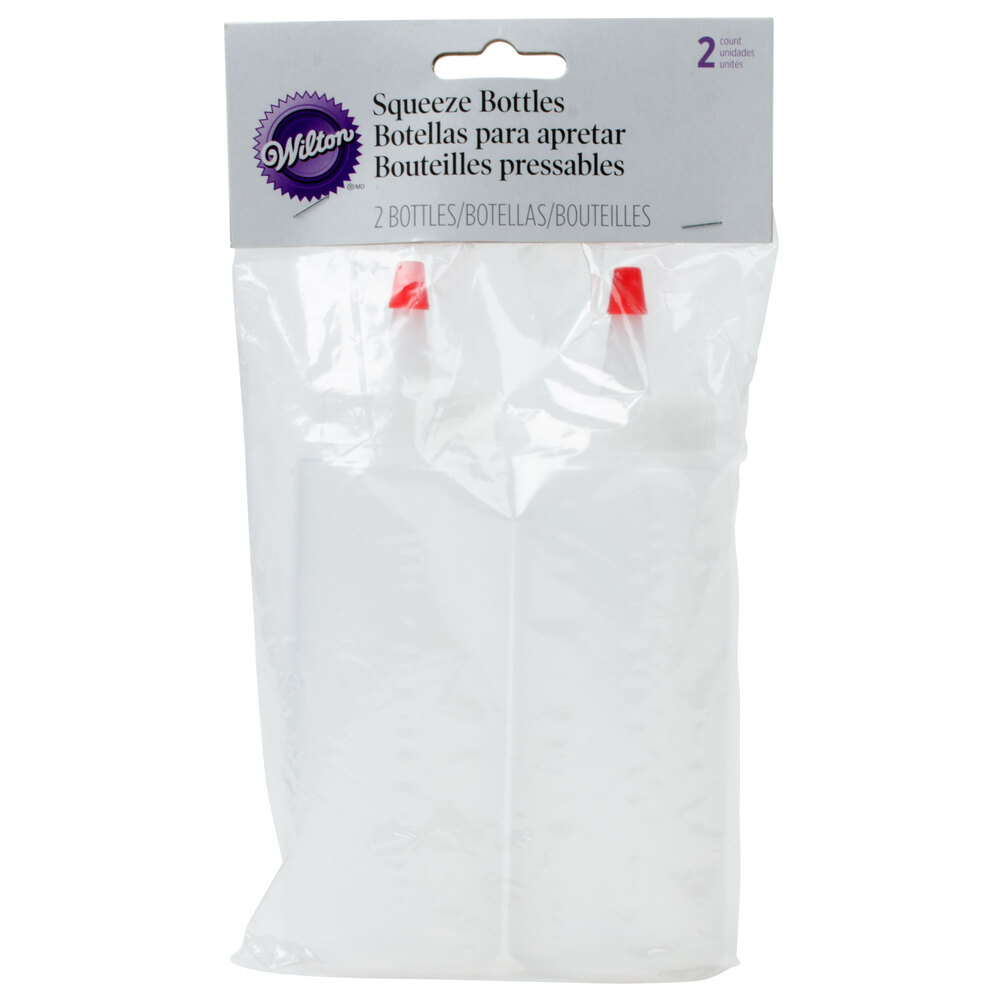
They don't hold much, so I ended up having to refill them after every four cupcakes or so, which was kind of a pain, but they did make forming the cupcakes a lot neater and easier. I used a funnel to spoon the batters neatly into the bottles.
When you make a zebra cake, you first pipe or ladle a small circle of one batter into the bottom of your baking pan. Then you pipe a roughly equal amount of the other color onto the center of the first circle. The lower circle then spreads out around the upper one. Then you pipe more of the first color onto the center of the upper one, and keep alternating colors until your pan is full. It's important to hold the piping tip close to the batter in the pan so it comes out neat, but not so close it dips into the batter in the pan.
For cupcakes, you do the same thing on a smaller scale, umpteen times. You need patience.
From previous experience, I learned that printed cupcake liners often darken their colors and turn dingy looking in the oven. The solution is to bake them in doubled liners. Unfortunately, I didn't have enough of the leopard-print liner to double all of the cupcakes, so I decided to use plain white liners for the insides and stick them inside the leopard liners. This did not turn out too well, as the liners did not fit together perfectly and leopard ones spread out while the white shrank inwards, so they came out separated instead of nestled inside each other


Very strange. I have never had that happen. I googled around a lot, but couldn't find anything that would shed any light on why this happened. The only thing I can think of is, too much mixing what with adding all that food coloring.
I ended up making another batch of cupcakes, actual orange striped ones this time. I actually had enough black batter left over from before, so I only made half the recipe to get orange. This time, I was super careful and the color turned out perfect. But they still all came out with that weird little crater on the bottom.
.jpg)
No matter. I wasn't going to redo these guys. I got to work making these cute little fondant lions. I found the original inspiration photo on Etsy, here.
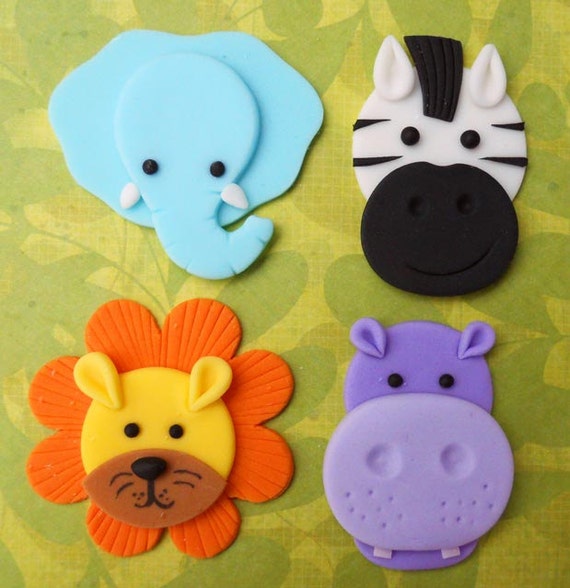
I used more "natural" coloring, and didn't bother with the texture on the lion's mane. I often make and color my own marshmallow fondant, but these cupcakes had eaten up quite enough of my time so I went with store-bought this time. I used a flower cookie cutter for the mane shape, and an upside-down shot glass to cut out the face. I'm too cheap to buy a round cookie cutter, ha ha! For the muzzles, I cut out more circles and cut off the bottoms with the same shot glass. The ears were cut out with the "wrong" end of a medium-sized piping tip, cut in half, and pinched at the bottoms. I melted chocolate in a small ziploc bag and cut the tiniest of holes in one corner to pipe little dots for the eyes. For the noses, I piped a little horizontal line shape and used a toothpick to draw the center of it down a little bit to form the point of the triangle. The rest of the features are done with an edible marker.


See the fingerprint?You would not be able to use this to ice cookies and then stack them, for example, but they did hold the fondant on the cupcakes, as long as I kept them in a cardboard box, When I sealed a few cupcakes in a plastic bag overnight, the glaze turned totally mushy. But it was a little bit shiny, tasted good, and was easy to use to dip and get a nice even coating on the cupcakes.

I'm reposting the original recipe below if you want to try it. I made the following changes: I added food coloring, and quite a lot of it, at that. And, I needed them to be dairy-free, so I used water in place of the milk. I do that all the time in baking, and I have never had a problem thus far, but these obviously did not come out quite right, so maybe that was a possible cause.Who knows. The only other thing I think it could have been was overmixing, what with all the food coloring I added. Or the batter texture issues caused by all that food coloring. Maybe I will try again and see. Or maybe not. One other change was using vanilla extract in place of vanilla powder, which I can't get in my area. I could not get a consensus on how much to add, so I just used a teaspoon, which is a typical amount found in cakes. The taste seemed fine to me.
Zebra Cake
(recipe from Farida)
Ingredients:
4 large eggs, at room temperature
4 large eggs, at room temperature
1 c. granulated sugar
1 c. milk, at room temperature
1 c. oil
1/3 tsp. vanilla powder (optional)
2 c. all-purpose flour
1 Tbsp. baking powder
4-5 Tbsp. dark cocoa powder
In a large mixing bowl, combine eggs and sugar. Using a hand-held electric mixer or wire whisk beat until the mixture is creamy and light in color.
Add milk and oil, and continue beating until well blended.
Add vanilla powder and baking powder to the mixture. Gradually add flour and then beat until the batter is smooth and the dry ingredients are thoroughly incorporated.
Divide the mixture into 2 equal portions. Keep one portion plain. Add cocoa powder into another and mix well. The color of the cocoa batter should be quite dark, so add more if needed.
Preheat the oven to 350 F.
Preheat the oven to 350 F.
Lightly grease the pan with oil. If you don't have non-stick baking pan, grease whatever pan you have then line it with parchment paper.
The most important part is assembling the cake batter in a baking pan. This is what you do. Scoop 3 heaped tablespoons of plain batter (you can also use a ladle that would hold 3 tablespoons) into the middle of the baking pan. Then scoop 3 tablespoons of cocoa batter and pour it in the center on top of the plain batter. NOTE: Do not spread the batter or tilt the pan to distribute the mixture. It will spread by itself and fill the pan gradually. Continue alternating the batters until you finish them. The pictures below will guide you through.
Bake in the oven for about 40 minutes. Do not open the oven door at least the first 20 minutes or the cake will shrink and will not rise. To check if the cake is ready, insert a toothpick into the center. It should come out clean when ready. Remove from the oven. Immediately run a small thin knife around the inside of the pan to loosen the cake, then invert the cake onto a cooking rack. Turn the cake back over and let cool.
Chocolate Glaze
- 2 Tbsp. melted butter or 2 tablespoons oil (melted coconut oil works fine too)
- 2 Tbsp. unsweetened cocoa
- 2 Tbsp. hot water
- 1 c. confectioners' sugar
- 1/2 tsp. vanilla extract
- Mix together ingredients in a bowl. Stir until smooth. Add additional hot water (1-2 teaspoons at a time) to thin if needed. As sauce cools it will begin to thicken. To keep at the same consistency you may need to add in an additional 1-2 teaspoons of water at a time to thin and keep in it's original form. Dip cookies, donuts, or pour over cake or cupcakes for a glaze.
- Glaze makes enough to dip the tops of approximately 12 cookies depending on size, 12-18 donut holes, the tops of 6-12 regular donuts, the tops of 12-18 mini donuts, one 9" round cake or the tops of 8-12 cupcakes.